(Edited text.) |
(I imagine there used to be only four colours, and whoever added the last one just forgot to change the number as well. It happens to the best of us! :)) |
||
| (48 intermediate revisions by 9 users not shown) | |||
| Line 1: | Line 1: | ||
| + | {| |
||
| + | | style="vertical-align:top;width:50%;" | {{PAGENAME}} are flowers that produce pollen, which is used to level up butterflies and to feed and level up the [[Bee Fly]]. <br/><br/> |
||
| + | They can be [[#Upgrading|upgraded]] with [[Currency#Flutterbucks|Flutterbucks]] to produce more pollen per [[#Shifts|shift]] and improve the [[Currency#Honeydew|Honeydew]] [[#Production Values|efficiency]]. |
||
| + | Some butterflies can use their [[Special Abilities|Special Ability]] to halve the cost of a shift, and the [[Buff-Tailed Bumblebee]] can double the pollen created.{{Clear}}<br/>[[File:20130227UpgradePollenFlowers.png|275px|left]] |
||
| + | | style="text-align:right;vertical-align:top;" | [[File:20130405PollenFlowersShifts.png|right|275px]]{{Clear}}There is currently a maximum total of six {{PAGENAME}} in the [[forest]] with fixed [[#Spots|spots]].<br/> |
||
| + | They come in five [[#Colours|colours]]: blue, pink, red, yellow and orange. |
||
| + | |} |
||
| + | ==Shifts== |
||
| + | {| align="right" width="50%" |
||
| + | | style="vertical-align:top;text-align:center;padding-left:50px;" | '''Shift Menu''' |
||
| + | {{Toggle|{{{1|[[File:Pollen Flower Menu§Stage01.png|300px]]}}}||var1g}} |
||
| + | {{Toggle||{{{2|[[File:Pollen Flower Menu§Stage02.png|300px]]}}}|var2g}} |
||
| + | {{Toggle||{{{3|[[File:Pollen Flower Menu§Stage03.png|300px]]}}}|var3g}} |
||
| + | {{Toggle||{{{4|[[File:Pollen Flower Menu§Stage04.png|300px]]}}}|var4g}} |
||
| + | {{Toggle||{{{5|[[File:Pollen Flower Menu§Stage05.png|300px]]}}}|var5g}} |
||
| + | {{Toggle||{{{6|[[File:Pollen Flower Menu§Stage01_NoHoneydew.png|300px]]}}}|var6g}} |
||
| + | {{Toggle||{{{6|[[File:Pollen Flower Menu§Stage05_CollectFirst.png|300px]]}}}|var7g}} |
||
| + | '''<div style="font-size:95%;"><span class="_toggle var1g"><span style="color:#0099EE;">Stage 1</span></span><span class="_toggle inact1g _toggler_hide-var2g _toggler_hide-var3g _toggler_hide-var4g _toggler_hide-var5g _toggler_hide-var6g _toggler_hide-var7g _toggler_hide-inact1g _toggler_show-var1g _toggler_show-inact2g _toggler_show-inact3g _toggler_show-inact4g _toggler_show-inact5g _toggler_show-inact6g _toggler_show-inact7g" style="display:none;">Stage 1</span> – <span class="_toggle var2g" style="display:none;"><span style="color:#0099EE;">Stage 2</span></span><span class="_toggle inact2g _toggler_hide-var1g _toggler_hide-var3g _toggler_hide-var4g _toggler_hide-var5g _toggler_hide-var6g _toggler_hide-var7g _toggler_hide-inact2g _toggler_show-var2g _toggler_show-inact1g _toggler_show-inact3g _toggler_show-inact4g _toggler_show-inact5g _toggler_show-inact6g _toggler_show-inact7g">Stage 2</span> – <span class="_toggle var3g" style="display:none;"><span style="color:#0099EE;">Stage 3</span></span><span class="_toggle inact3g _toggler_hide-var1g _toggler_hide-var2g _toggler_hide-var4g _toggler_hide-var5g _toggler_hide-var6g _toggler_hide-var7g _toggler_hide-inact3g _toggler_show-var3g _toggler_show-inact1g _toggler_show-inact2g _toggler_show-inact4g _toggler_show-inact5g _toggler_show-inact6g _toggler_show-inact7g">Stage 3</span> – <span class="_toggle var4g" style="display:none;"><span style="color:#0099EE;">Stage 4</span></span><span class="_toggle inact4g _toggler_hide-var1g _toggler_hide-var2g _toggler_hide-var3g _toggler_hide-var5g _toggler_hide-var6g _toggler_hide-var7g _toggler_hide-var7g _toggler_hide-inact4g _toggler_show-var4g _toggler_show-inact1g _toggler_show-inact2g _toggler_show-inact3g _toggler_show-inact5g _toggler_show-inact6g _toggler_show-inact7g">Stage 4</span> – <span class="_toggle var5g" style="display:none;"><span style="color:#0099EE;">Stage 5</span></span><span class="_toggle inact5g _toggler_hide-var1g _toggler_hide-var2g _toggler_hide-var3g _toggler_hide-var4g _toggler_hide-var6g _toggler_hide-var7g _toggler_hide-inact5g _toggler_show-var5g _toggler_show-inact1g _toggler_show-inact2g _toggler_show-inact3g _toggler_show-inact4g _toggler_show-inact6g _toggler_show-inact7g">Stage 5</span><br><span class="_toggle var6g" style="display:none;"><span style="color:#0099EE;">Low Honeydew Balance</span></span><span class="_toggle inact6g _toggler_hide-var1g _toggler_hide-var2g _toggler_hide-var3g _toggler_hide-var4g _toggler_hide-var5g _toggler_hide-var7g _toggler_hide-inact6g _toggler_show-var6g _toggler_show-inact1g _toggler_show-inact2g _toggler_show-inact3g _toggler_show-inact4g _toggler_show-inact5g _toggler_show-inact7g">Low Honeydew Balance</span> – <span class="_toggle var7g" style="display:none;"><span style="color:#0099EE;">Pollen Overcapped</span></span><span class="_toggle inact7g _toggler_hide-var1g _toggler_hide-var2g _toggler_hide-var3g _toggler_hide-var4g _toggler_hide-var5g _toggler_hide-var6g _toggler_hide-inact7g _toggler_show-var7g _toggler_show-inact1g _toggler_show-inact2g _toggler_show-inact3g _toggler_show-inact4g _toggler_show-inact5g _toggler_show-inact6g">Pollen Overcapped</span></div>''' |
||
| + | |} |
||
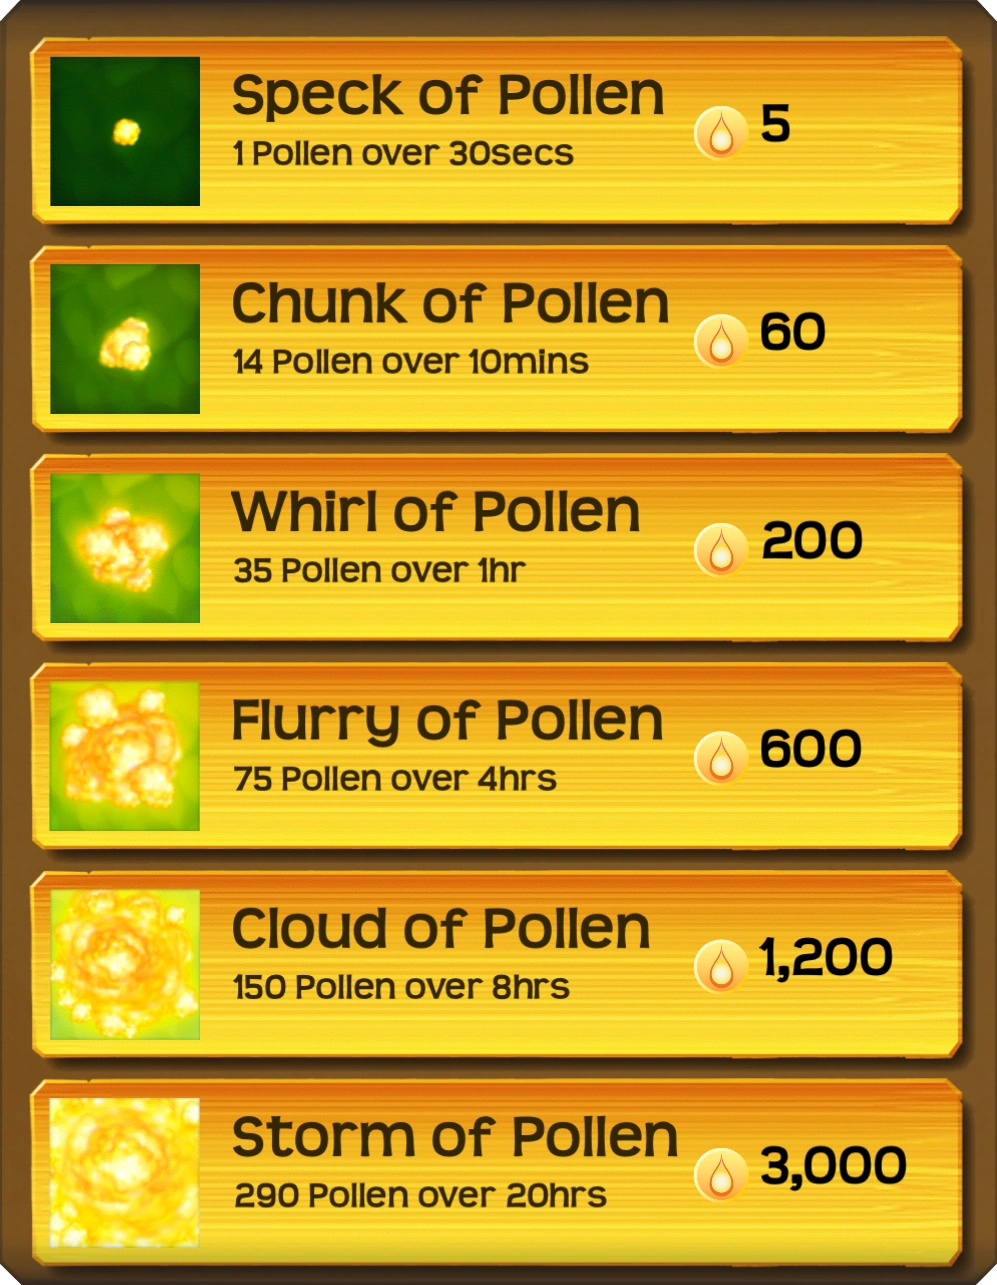
| + | To get pollen from {{PAGENAME}}, you must choose a shift, which can be hurried with [[Currency#Flutterbucks|Flutterbucks]].<br/> |
||
| + | [[File:PollenFlower§Yellow_ManyPollen.png|200px|left]] The amount of pollen you can ''keep'' in your forest at once is limited to a maximum of 1,000 pollen per Pollen Flower unlocked (irrespective of upgrade level). While it is possible to exceed this cap with the use of the [[Buff-Tailed Bumblebee|Honeybee]], it is not possible to start new shifts until you have fed enough pollen to your butterflies.<br/><br/> |
||
| + | [[File:Pollen Flower Menu§CurrentPollenOvercappedMax.png|300px|center]]<br/> |
||
| + | In order to start a shift you must have space for the amount the shift produces (without having been doubled by the [[Buff-Tailed Bumblebee|Honeybee]]) plus 1. The maximum amount of pollen possible is therefore 9,717, achieved by starting six [[Buff-Tailed Bumblebee|Honeybee]] improved "Storm of Pollen" shifts while at 5,661 pollen. |
||
| + | {{Clear}} |
||
| + | ==Upgrading== |
||
| + | {| |
||
| + | | style="vertical-align:top;" | [[File:Button§UpgradePollenFlower_NA_ExpandToUnlock.png|left|250px]] |
||
| + | | style="vertical-align:top;" | During the [[Tutorial]] you are introduced to upgrading {{PAGENAME}}. Before you reach this step the button will be greyed out. |
||
| + | |- |
||
| + | | style="vertical-align:top;" | [[File:Button§UpgradePollenFlower.png|left|250px]] |
||
| + | | style="vertical-align:top;" | Each flower upgrade will require spending increasingly more [[Currency#Flutterbucks|Flutterbucks]]: |
||
| + | * First upgrade to 2<sup>nd</sup> Stage {{FB}} 5 |
||
| + | * Second upgrade to 3<sup>rd</sup> Stage {{FB}} 10 |
||
| + | * Third upgrade to 4<sup>th</sup> Stage {{FB}} 20 |
||
| + | * Fourth upgrade to 5<sup>th</sup> Stage {{FB}} 40. <br/> |
||
| + | Upgrading a {{PAGENAME}} completely costs {{FB}} 75 in total and upgrading all six {{PAGENAME}} costs a total of {{FB}} 445 (as the upgrade during the [[Tutorial]] is free). |
||
| + | |- |
||
| + | | style="vertical-align:top;" | [[File:Button§UpgradePollenFlower_NA_FullyUpgraded.png|left|250px]] |
||
| + | | style="vertical-align:top;" | Once you have fully upgraded a Pollen Flower, the button will be greyed out again. |
||
| + | |} |
||
| + | {{Clear}} |
||
| + | ==Production Values== |
||
| + | The shorter the shift, the more pollen you will get per honeydew invested. A longer shift will result in more pollen, but at a higher cost. (This table doesn't reflect the usage of one or more [[Buff-Tailed Bumblebee|Honeybees]] or the usage of the [[Special Ability]] to half the cost of the next pollen flower shift.) |
||
| − | [[File:Pollen flowers.jpg|center|300px]] |
||
| + | {| class="article-table" cellpadding=0 cellspacing=0 style="width:100%;border-top:1px solid #b2af9c;border-bottom:1px solid #b2af9c;border-left:1px solid #b2af9c;border-right:1px solid #b2af9c;text-align:center;" |
||
| − | |||
| − | Pollen flowers are flowers that produce pollen, which is used to level up butterflies. They can be upgraded with Flutterbucks to make more pollen. They come in 4 colors - pink, red, blue and yellow. |
||
| − | |||
| − | There is currently a total of 6 pollen flowers in the forest. |
||
| − | |||
| − | <gallery type="slideshow" position="center" crop="true"> |
||
| − | 2013-08-20 22.33.00.png|Pollen flower at work. |
||
| − | 2013-08-20 22.35.16.png|Pollen flower ready to be collected. |
||
| − | 2013-08-20 22.35.20.png|Pollen flower at rest. |
||
| − | </gallery> |
||
| − | ==Flower Shifts== |
||
| − | |||
| − | * To get pollen from the flower, you must choose a shift. The shorter the shift, the more pollen one will get per honeydew invested. A longer shift will result in more pollen, but at a higher cost. |
||
| − | * You can hurry pollen flowers with flutterbucks. |
||
| − | * In May 2014, a pollen cap was added by the developers. This means that the amount of pollen you can keep in your forest at once is limited to a maximum of 1,000 pollen per pollen flower (irrespective of upgrade level). You should not be able to get over this cap anymore and also are not able to start new shifts until you have fed enough pollen to your butterflies. |
||
| − | |||
| − | |||
| − | ===Production values=== |
||
| − | {|border="1" cellpadding="1" cellspacing="1" class="article-table" |
||
|- |
|- |
||
| + | ! style="text-align:center;" | [[#Shifts|Shift]] |
||
| − | ! scope="col"|Shift Name |
||
| + | ! style="text-align:center;" | Stage |
||
| − | ! scope="col"|Flower Level |
||
| − | ! |
+ | ! style="text-align:center;" | [[File:Icon§PollenTotal.png|22px]] Generated |
| + | ! style="text-align:center;" | {{HD}} per [[File:Icon§PollenTotal.png|25px]] |
||
| − | ! scope="col"|Cost/pollen |
||
| + | ! style="text-align:center;" | [[File:Icon§PollenTotal.png|22px]] per minute |
||
| − | ! scope="col"|Cost (honeydew) |
||
| + | ! style="text-align:center;" | [[File:Icon§PollenTotal.png|22px]] per hour |
||
| − | ! scope="col"|Time |
||
|- |
|- |
||
| − | | rowspan="5"|Speck of Pollen |
+ | | rowspan="5" style="border-right:1px solid #b2af9c;" | '''Speck of Pollen'''<br/> |
| + | [[File:Icon§PollenProduction_SpeckOfPollen(1).png|center|80px]] |
||
| − | |1 |
||
| + | <div style="font-size:90%">{{HD}} 5<br/> |
||
| − | |1 |
||
| + | [[File:Icon§Clock.png|12px]] 30 seconds</div> |
||
| − | |5 |
||
| + | |1||1||{{#expr:5/1 round 2}}||{{#expr:1*2 round 2}}||{{#expr:1*120 round 2}} |
||
| − | | rowspan="5"|5 |
||
| − | | rowspan="5"|30 sec |
||
|- |
|- |
||
| + | |2||3||{{#expr:5/3 round 2}}||{{#expr:3*2 round 2}}||{{#expr:3*120 round 2}} |
||
| − | |2 |
||
| − | |3 |
||
| − | |1.67 |
||
|- |
|- |
||
| + | |3||5||{{#expr:5/5 round 2}}||{{#expr:5*2 round 2}}||{{#expr:5*120 round 2}} |
||
| − | |3 |
||
| − | |5 |
||
| − | |1 |
||
|- |
|- |
||
| + | |4||7||{{#expr:5/7 round 2}}||{{#expr:7*2 round 2}}||{{#expr:7*120 round 2}} |
||
| − | |4 |
||
| − | |7 |
||
| − | |0.71 |
||
|- |
|- |
||
| + | |5||9||{{#expr:5/9 round 2}}||{{#expr:9*2 round 2}}||{{#expr:9*120 round 2}} |
||
| − | |5 |
||
| − | |9 |
||
| − | |0.56 |
||
|- |
|- |
||
| − | | rowspan="5"|Chunk of Pollen |
+ | | rowspan="5" style="border-right:1px solid #b2af9c;" | '''Chunk of Pollen'''<br/> |
| + | [[File:Icon§PollenProduction_ChunkOfPollen(2).png|center|80px]] |
||
| − | |1 |
||
| + | <div style="font-size:90%">{{HD}} 60<br/> |
||
| − | |14 |
||
| + | [[File:Icon§Clock.png|12px]] 10 minutes</div> |
||
| − | |4.3 |
||
| + | |1||14||{{#expr:60/14 round 2}}||{{#expr:14/10 round 2}}||{{#expr:14/10*60 round 2}} |
||
| − | | rowspan="5"|60 |
||
| − | | rowspan="5"|10 min |
||
|- |
|- |
||
| + | |2||18||{{#expr:60/18 round 2}}||{{#expr:18/10 round 2}}||{{#expr:18/10*60 round 2}} |
||
| − | |2 |
||
| − | |18 |
||
| − | |3.33 |
||
|- |
|- |
||
| + | |3||22||{{#expr:60/22 round 2}}||{{#expr:22/10 round 2}}||{{#expr:22/10*60 round 2}} |
||
| − | |3 |
||
| − | |22 |
||
| − | |2.7 |
||
|- |
|- |
||
| + | |4||26||{{#expr:60/26 round 2}}||{{#expr:26/10 round 2}}||{{#expr:26/10*60 round 2}} |
||
| − | |4 |
||
| − | |26 |
||
| − | |2.3 |
||
|- |
|- |
||
| + | |5||30||{{#expr:60/30 round 2}}||{{#expr:30/10 round 2}}||{{#expr:30/10*60 round 2}} |
||
| − | |5 |
||
| − | |30 |
||
| − | |2.0 |
||
|- |
|- |
||
| − | | rowspan="5"|Whirl of Pollen |
+ | | rowspan="5" style="border-right:1px solid #b2af9c;" | '''Whirl of Pollen'''<br/> |
| + | [[File:Icon§PollenProduction_WhirlOfPollen(3).png|center|80px]] |
||
| − | |1 |
||
| + | <div style="font-size:90%">{{HD}} 200<br/> |
||
| − | |35 |
||
| + | [[File:Icon§Clock.png|12px]] 1 hour</div> |
||
| − | |5.7 |
||
| + | |1||35||{{#expr:200/35 round 2}}||{{#expr:35/60 round 2}}||35 |
||
| − | | rowspan="5"|200 |
||
| − | | rowspan="5"|1 hr |
||
|- |
|- |
||
| + | |2||41||{{#expr:200/41 round 2}}||{{#expr:41/60 round 2}}||41 |
||
| − | |2 |
||
| − | |41 |
||
| − | |4.88 |
||
|- |
|- |
||
| + | |3||47||{{#expr:200/47 round 2}}||{{#expr:47/60 round 2}}||47 |
||
| − | |3 |
||
| − | |47 |
||
| − | |4.2 |
||
|- |
|- |
||
| + | |4||53||{{#expr:200/53 round 2}}||{{#expr:53/60 round 2}}||53 |
||
| − | |4 |
||
| − | |53 |
||
| − | |3.8 |
||
|- |
|- |
||
| + | |5||59||{{#expr:200/59 round 2}}||{{#expr:59/60 round 2}}||59 |
||
| − | |5 |
||
| − | |59 |
||
| − | |3.4 |
||
|- |
|- |
||
| − | | rowspan="5"|Flurry of Pollen |
+ | | rowspan="5" style="border-right:1px solid #b2af9c;" | '''Flurry of Pollen'''<br/> |
| + | [[File:Icon§PollenProduction_FlurryOfPollen(4).png|center|80px]] |
||
| − | |1 |
||
| + | <div style="font-size:90%">{{HD}} 600<br/> |
||
| − | |75 |
||
| + | [[File:Icon§Clock.png|12px]] 4 hours</div> |
||
| − | |8 |
||
| + | |1||75||{{#expr:600/75 round 2}}||{{#expr:75/4/60 round 2}}||{{#expr:75/4 round 2}} |
||
| − | | rowspan="5"|600 |
||
| − | | rowspan="5"|4 hrs |
||
|- |
|- |
||
| + | |2||83||{{#expr:600/83 round 2}}||{{#expr:83/4/60 round 2}}||{{#expr:83/4 round 2}} |
||
| − | |2 |
||
| − | |83 |
||
| − | |7.23 |
||
|- |
|- |
||
| + | |3||91||{{#expr:600/91 round 2}}||{{#expr:91/4/60 round 2}}||{{#expr:91/4 round 2}} |
||
| − | |3 |
||
| − | |91 |
||
| − | |6.5 |
||
|- |
|- |
||
| + | |4||99||{{#expr:600/99 round 2}}||{{#expr:99/4/60 round 2}}||{{#expr:99/4 round 2}} |
||
| − | |4 |
||
| − | |99 |
||
| − | |6.1 |
||
|- |
|- |
||
| + | |5||107||{{#expr:600/107 round 2}}||{{#expr:107/4/60 round 2}}||{{#expr:107/4 round 2}} |
||
| − | |5 |
||
| − | |107 |
||
| − | |5.6 |
||
|- |
|- |
||
| − | | rowspan="5"|Cloud of Pollen |
+ | | rowspan="5" style="border-right:1px solid #b2af9c;" | '''Cloud of Pollen'''<br/> |
| + | [[File:Icon§PollenProduction_CloudOfPollen(5).png|center|80px]] |
||
| − | |1 |
||
| + | <div style="font-size:90%">{{HD}} 1,200<br/> |
||
| − | |150 |
||
| + | [[File:Icon§Clock.png|12px]] 8 hours</div> |
||
| − | |8 |
||
| + | |1||150||{{#expr:1200/150 round 2}}||{{#expr:150/8/60 round 2}}||{{#expr:150/8 round 2}} |
||
| − | | rowspan="5"|1,200 |
||
| − | | rowspan="5"|8 hrs |
||
|- |
|- |
||
| + | |2||160||{{#expr:1200/160 round 2}}||{{#expr:160/8/60 round 2}}||{{#expr:160/8 round 2}} |
||
| − | |2 |
||
| − | |160 |
||
| − | |7.5 |
||
|- |
|- |
||
| + | |3||170||{{#expr:1200/170 round 2}}||{{#expr:170/8/60 round 2}}||{{#expr:170/8 round 2}} |
||
| − | |3 |
||
| − | |170 |
||
| − | |7.0 |
||
|- |
|- |
||
| + | |4||180||{{#expr:1200/180 round 2}}||{{#expr:180/8/60 round 2}}||{{#expr:180/8 round 2}} |
||
| − | |4 |
||
| − | |180 |
||
| − | |6.7 |
||
|- |
|- |
||
| + | |5||190||{{#expr:1200/190 round 2}}||{{#expr:190/8/60 round 2}}||{{#expr:190/8 round 2}} |
||
| − | |5 |
||
| − | |190 |
||
| − | |6.3 |
||
|- |
|- |
||
| − | | rowspan="5"|Storm of Pollen |
+ | | rowspan="5" style="border-right:1px solid #b2af9c;" | '''Storm of Pollen'''<br/> |
| + | [[File:Icon§PollenProduction_StormOfPollen(6).png|center|80px]] |
||
| − | |1 |
||
| + | <div style="font-size:90%">{{HD}} 3,000<br/> |
||
| − | |290 |
||
| + | [[File:Icon§Clock.png|12px]] 20 hours</div> |
||
| − | |10.3 |
||
| + | |1||290||{{#expr:3000/290 round 2}}||{{#expr:290/20/60 round 2}}||{{#expr:290/20 round 2}} |
||
| − | | rowspan="5"|3,000 |
||
| − | | rowspan="5"|20 hrs |
||
|- |
|- |
||
| + | |2||302||{{#expr:3000/302 round 2}}||{{#expr:302/20/60 round 2}}||{{#expr:302/20 round 2}} |
||
| − | |2 |
||
| − | |302 |
||
| − | |9.93 |
||
|- |
|- |
||
| + | |3||314||{{#expr:3000/314 round 2}}||{{#expr:314/20/60 round 2}}||{{#expr:314/20 round 2}} |
||
| − | |3 |
||
| − | |314 |
||
| − | |9.5 |
||
|- |
|- |
||
| + | |4||326||{{#expr:3000/326 round 2}}||{{#expr:326/20/60 round 2}}||{{#expr:326/20 round 2}} |
||
| − | |4 |
||
| − | |326 |
||
| − | |9.2 |
||
|- |
|- |
||
| + | |5||338||{{#expr:3000/338 round 2}}||{{#expr:338/20/60 round 2}}||{{#expr:338/20 round 2}} |
||
| − | |5 |
||
| − | |338 |
||
| − | |8.9 |
||
|} |
|} |
||
| + | ==Spots== |
||
| + | [[File:Forest§PollenFlowerSpots.png|right|300px]] When [[Forest Expansions|expanding]] through the [[forest]] occasionally you will find a Pollen Flower spot instead of more space for your butterflies. These spots are fixed and apart from the first two flowers they can be unlocked in any order. |
||
| + | <br/> |
||
| + | [[File:Icon§FlowerSpot.png|80px|center]] |
||
| + | <br/> |
||
| + | The picture to the right shows the spots where Pollen Flowers can be found. |
||
| + | {{Clear}} |
||
| + | ==Colours== |
||
| + | There are five possible colours for {{PAGENAME}}. The first flower unlocked is blue and the second is pink, however the colours of the remaining flowers are completely random, so there is no guarantee that all five colours will be present in your forest. It is not possible to influence the starting colour of a Pollen Flower, but it can be changed by using a [[#Special Abilities|Special Ability]]. |
||
| + | <center> |
||
| + | {| |
||
| + | |- |
||
| + | | <gallery type="slideshow" hideaddbutton="true"> |
||
| + | PollenFlower§BlueLevel01Idle.png|Blue at Stage 1 – Idle |
||
| + | PollenFlower§BlueLevel01Producing.png|Blue at Stage 1 – Producing Pollen |
||
| + | PollenFlower§BlueLevel01Ready.png|Blue at Stage 1 – Ready to Release Pollen |
||
| + | PollenFlower§BlueLevel02Idle.png|Blue at Stage 2 – Idle |
||
| + | PollenFlower§BlueLevel02Producing.png|Blue at Stage 2 – Producing Pollen |
||
| + | PollenFlower§BlueLevel02Ready.png|Blue at Stage 2 – Ready to Release Pollen |
||
| + | PollenFlower§BlueLevel03Idle.png|Blue at Stage 3 – Idle |
||
| + | PollenFlower§BlueLevel03Producing.png|Blue at Stage 3 – Producing Pollen |
||
| + | PollenFlower§BlueLevel03Ready.png|Blue at Stage 3 – Ready to Release Pollen |
||
| + | PollenFlower§BlueLevel04Idle.png|Blue at Stage 4 – Idle |
||
| + | PollenFlower§BlueLevel04Producing.png|Blue at Stage 4 – Producing Pollen |
||
| + | PollenFlower§BlueLevel04Ready.png|Blue at Stage 4 – Ready to Release Pollen |
||
| + | PollenFlower§BlueLevel05Idle.png|Blue at Stage 5 – Idle |
||
| + | PollenFlower§BlueLevel05Pop.png|Blue at Stage 5 Pop Notification |
||
| + | PollenFlower§BlueLevel05Producing.png|Blue at Stage 5 – Producing Pollen |
||
| + | PollenFlower§BlueLevel05Ready.png|Blue at Stage 5 – Ready to Release Pollen |
||
| + | </gallery> |
||
| + | | <gallery type="slideshow" hideaddbutton="true"> |
||
| + | PollenFlower§PinkLevel01Idle.png|Pink at Stage 1 – Idle |
||
| + | PollenFlower§PinkLevel01Producing.png|Pink at Stage 1 – Producing Pollen |
||
| + | PollenFlower§PinkLevel01Ready.png|Pink at Stage 1 – Ready to Release Pollen |
||
| + | PollenFlower§PinkLevel02Idle.png|Pink at Stage 2 – Idle |
||
| + | PollenFlower§PinkLevel02Producing.png|Pink at Stage 2 – Producing Pollen |
||
| + | PollenFlower§PinkLevel02Ready.png|Pink at Stage 2 – Ready to Release Pollen |
||
| + | PollenFlower§PinkLevel03Idle.png|Pink at Stage 3 – Idle |
||
| + | PollenFlower§PinkLevel03Producing.png|Pink at Stage 3 – Producing Pollen |
||
| + | PollenFlower§PinkLevel03Ready.png|Pink at Stage 3 – Ready to Release Pollen |
||
| + | PollenFlower§PinkLevel04Idle.png|Pink at Stage 4 – Idle |
||
| + | PollenFlower§PinkLevel04Producing.png|Pink at Stage 4 – Producing Pollen |
||
| + | PollenFlower§PinkLevel04Ready.png|Pink at Stage 4 – Ready to Release Pollen |
||
| + | PollenFlower§PinkLevel05Idle.png|Pink at Stage 5 – Idle |
||
| + | PollenFlower§PinkLevel05Pop.png|Pink at Stage 5 – Pop Notification |
||
| + | PollenFlower§PinkLevel05Producing.png|Pink at Stage 5 – Producing Pollen |
||
| + | PollenFlower§PinkLevel05Ready.png|Pink at Stage 5 – Ready to Release Pollen |
||
| + | </gallery> |
||
| + | |- |
||
| + | | <gallery type="slideshow" hideaddbutton="true"> |
||
| + | PollenFlower§RedLevel01Idle.png|Red at Stage 1 – Idle |
||
| + | PollenFlower§RedLevel01Producing.png|Red at Stage 1 – Producing Pollen |
||
| + | PollenFlower§RedLevel01Ready.png|Red at Stage 1 – Ready to Release Pollen |
||
| + | PollenFlower§RedLevel02Idle.png|Red at Stage 2 – Idle |
||
| + | PollenFlower§RedLevel02Producing.png|Red at Stage 2 – Producing Pollen |
||
| + | PollenFlower§RedLevel02Ready.png|Red at Stage 2 – Ready to Release Pollen |
||
| + | PollenFlower§RedLevel03Idle.png|Red at Stage 3 – Idle |
||
| + | PollenFlower§RedLevel03Producing.png|Red at Stage 3 – Producing Pollen |
||
| + | PollenFlower§RedLevel03Ready.png|Red at Stage 3 – Ready to Release Pollen |
||
| + | PollenFlower§RedLevel04Idle.png|Red at Stage 4 – Idle |
||
| + | PollenFlower§RedLevel04Producing.png|Red at Stage 4 – Producing Pollen |
||
| + | PollenFlower§RedLevel04Ready.png|Red at Stage 4 – Ready to Release Pollen |
||
| + | PollenFlower§RedLevel05Idle.png|Red at Stage 5 – Idle |
||
| + | PollenFlower§RedLevel05Pop.png|Red at Stage 5 – Pop Notification |
||
| + | PollenFlower§RedLevel05Producing.png|Red at Stage 5 – Producing Pollen |
||
| + | PollenFlower§RedLevel05Ready.png|Red at Stage 5 – Ready to Release Pollen |
||
| + | </gallery> |
||
| + | | <gallery type="slideshow" hideaddbutton="true"> |
||
| + | PollenFlower§YellowLevel01Idle.png|Yellow at Stage 1 – Idle |
||
| + | PollenFlower§YellowLevel01Producing.png|Yellow at Stage 1 – Producing Pollen |
||
| + | PollenFlower§YellowLevel01Ready.png|Yellow at Stage 1 – Ready to Release Pollen |
||
| + | PollenFlower§YellowLevel02Idle.png|Yellow at Stage 2 – Idle |
||
| + | PollenFlower§YellowLevel02Producing.png|Yellow at Stage 2 – Producing Pollen |
||
| + | PollenFlower§YellowLevel02Ready.png|Yellow at Stage 2 – Ready to Release Pollen |
||
| + | PollenFlower§YellowLevel03Idle.png|Yellow at Stage 3 – Idle |
||
| + | PollenFlower§YellowLevel03Producing.png|Yellow at Stage 3 – Producing Pollen |
||
| + | PollenFlower§YellowLevel03Ready.png|Yellow at Stage 3 – Ready to Release Pollen |
||
| + | PollenFlower§YellowLevel04Idle.png|Yellow at Stage 4 – Idle |
||
| + | PollenFlower§YellowLevel04Producing.png|Yellow at Stage 4 – Producing Pollen |
||
| + | PollenFlower§YellowLevel04Ready.png|Yellow at Stage 4 – Ready to Release Pollen |
||
| + | PollenFlower§YellowLevel05Idle.png|Yellow at Stage 5 – Idle |
||
| + | PollenFlower§YellowLevel05Pop.png|Yellow at Stage 5 – Pop Notification |
||
| + | PollenFlower§YellowLevel05Producing.png|Yellow at Stage 5 – Producing Pollen |
||
| + | PollenFlower§YellowLevel05Ready.png|Yellow at Stage 5 – Ready to Release Pollen |
||
| + | </gallery> |
||
| + | |- |
||
| + | | colspan="2" | <gallery type="slideshow" hideaddbutton="true" position="center"> |
||
| + | PollenFlowers§OrangeLevel05Idle.png|Orange at Stage 5 – Idle |
||
| + | PollenFlowers§OrangeLevel05Producing.png|Orange at Stage 5 – Producing Pollen |
||
| + | PollenFlowers§OrangeLevel05Ready.png|Orange at Stage 5 – Ready to Release Pollen |
||
| + | </gallery> |
||
| + | |} |
||
| + | </center> |
||
| + | ==Special Abilities== |
||
| + | In addition to the [[Buff-Tailed Bumblebee]]'s ability to double the amount of pollen, also some butterflies can influence {{PAGENAME}} using their [[Special Ability]]: |
||
| + | ;Half the Cost of a Pollen Flower's Next Shift every two days |
||
| + | * [[Red Lacewing]] |
||
| + | * [[Black Jezebel]] |
||
| + | * [[Long-Tailed Skipper]] |
||
| + | * [[Great Blue Hairstreak]] |
||
| + | * [[Splendid Dotted Border]] |
||
| + | * [[Antea Clearwing]] |
||
| + | |||
| + | ;Hurry a Pollen Flower every 24 hours |
||
| + | * [[Crowned Hairstreak]] |
||
| + | * [[Yellow Dotted Border]] |
||
| + | * [[Hewitson's Agrias]] |
||
| + | |||
| + | ;Change the Color of a Pollen Flower every 5 days |
||
| + | * [[Large Fairy Hairstreak]] ([[Event Exclusive Rewards|Upgraded]] 2 days) |
||
| + | * [[Great Stripestreak]] ([[Event Exclusive Rewards|Upgraded]] 2 days) |
||
| + | ==Related [[Goals]]== |
||
| + | * Speedy Flower: Hurry a pollen flower (Reward: {{FB}} 2) |
||
| + | * Growing Up: Upgrade 2 Pollen Flowers (Reward: Twig [[File:Icon§Storage_Twig.png|15px]]) |
||
| + | * Growing Up II: Fully Upgrade a Pollen Flower (Reward: [[File:Epic§AF100%.png|20px]] [[Attraction Flowers|100% Epic]]) |
||
| + | * Shift Worker: Set 20 Flower shifts (Reward: {{HD}} 20) |
||
| + | * Shift Worker II: Set 250 Flower shifts (Reward: {{HD}} 1,000) |
||
| + | * Shift Worker III: Set 1,000 Flower shifts (Reward: {{HD}} 10,000) |
||
| + | * Hayfever: Collect 100 Pollen (Reward: {{HD}} 25) |
||
| + | * Hayfever II: Collect 1,000 Pollen (Reward: {{HD}} 10,000) |
||
| + | * Hayfever III: Collect 2,500 Pollen (Reward: {{HD}} 10,000) |
||
| + | * Long-Haul: Set a 20 hour shift (Reward: {{FB}} 2) |
||
| + | * Industrial Pollen: Flower shifts total 1 month (Reward: {{FB}} 10) |
||
==Notes== |
==Notes== |
||
* When fusing butterflies together, you can save pollen by only leveling up one of the two butterflies you plan to fuse. Fusing two butterflies that are both maxed out at level one will produce a butterfly at level one that can reach level two. Fusing two butterflies that can only reach level one, but are at level zero will produce a butterfly that can reach level two that is at level zero. Fusing one level zero butterfly with a level one (assuming both only have the potential to reach level one) will produce a butterfly that is at level one and can reach level two. Since fusing two butterflies will create a butterfly with a higher potential but the same level as the better of the two that were fused, you should only level up your best butterfly of each species when fusing. |
* When fusing butterflies together, you can save pollen by only leveling up one of the two butterflies you plan to fuse. Fusing two butterflies that are both maxed out at level one will produce a butterfly at level one that can reach level two. Fusing two butterflies that can only reach level one, but are at level zero will produce a butterfly that can reach level two that is at level zero. Fusing one level zero butterfly with a level one (assuming both only have the potential to reach level one) will produce a butterfly that is at level one and can reach level two. Since fusing two butterflies will create a butterfly with a higher potential but the same level as the better of the two that were fused, you should only level up your best butterfly of each species when fusing. |
||
| + | * The pollen cap was introduced with [[Game Updates|Update 1.85]] on 7<sup>th</sup> May 2014 to reduce lags in the game. |
||
| − | [[Category:Flowers]] |
||
| + | * Since the introduction of the [[Hairstreak]] Set 27<sup>th</sup> November 2014 it's possible to change Pollen Flower colour by using butterflies' [[Special Abilities]]. |
||
| − | [[Category:Recently changed pages]] |
||
| + | * Since January 2017 {{PAGENAME}} can be orange, too. |
||
| − | [[Category:Game Content]] |
||
| + | {{NO}} |
||
| + | [[Category:Flora]] |
||
Revision as of 21:48, 19 October 2018
| Pollen Flowers are flowers that produce pollen, which is used to level up butterflies and to feed and level up the Bee Fly. They can be upgraded with Flutterbucks to produce more pollen per shift and improve the Honeydew efficiency. Some butterflies can use their Special Ability to halve the cost of a shift, and the Buff-Tailed Bumblebee can double the pollen created.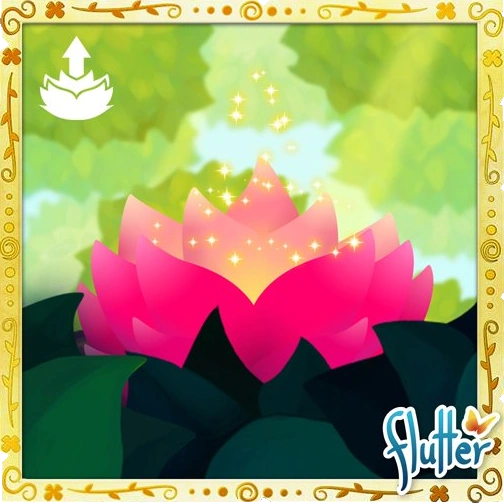 |
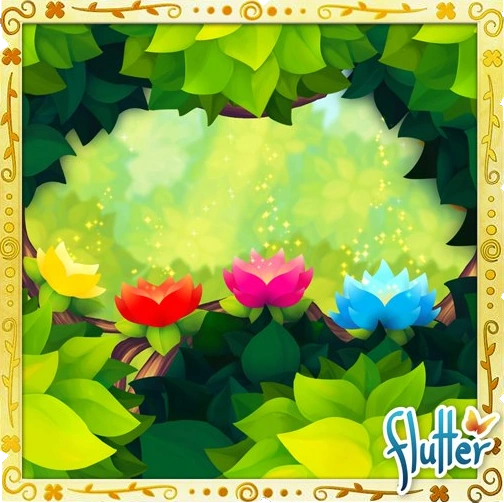 They come in five colours: blue, pink, red, yellow and orange. |
Shifts
Shift Menu
 Stage 1 – Stage 2 – Stage 3 – Stage 4 – Stage 5
Low Honeydew Balance – Pollen Overcapped |


To get pollen from Pollen Flowers, you must choose a shift, which can be hurried with Flutterbucks.
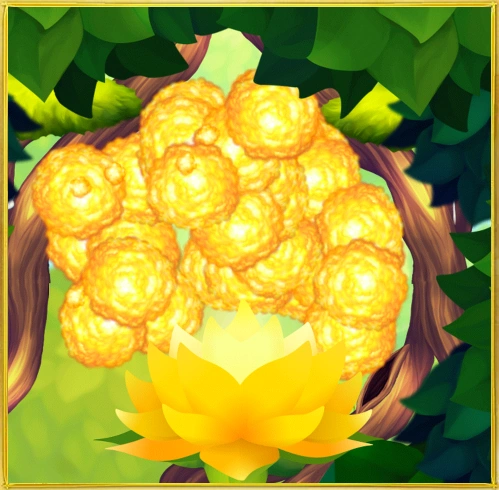
The amount of pollen you can keep in your forest at once is limited to a maximum of 1,000 pollen per Pollen Flower unlocked (irrespective of upgrade level). While it is possible to exceed this cap with the use of the Honeybee, it is not possible to start new shifts until you have fed enough pollen to your butterflies.

In order to start a shift you must have space for the amount the shift produces (without having been doubled by the Honeybee) plus 1. The maximum amount of pollen possible is therefore 9,717, achieved by starting six Honeybee improved "Storm of Pollen" shifts while at 5,661 pollen.
Upgrading
 |
During the Tutorial you are introduced to upgrading Pollen Flowers. Before you reach this step the button will be greyed out. |
 |
Each flower upgrade will require spending increasingly more Flutterbucks:
Upgrading a Pollen Flowers completely costs |
 |
Once you have fully upgraded a Pollen Flower, the button will be greyed out again. |
Production Values
The shorter the shift, the more pollen you will get per honeydew invested. A longer shift will result in more pollen, but at a higher cost. (This table doesn't reflect the usage of one or more Honeybees or the usage of the Special Ability to half the cost of the next pollen flower shift.)
| Shift | Stage | ||||
|---|---|---|---|---|---|
Speck of Pollen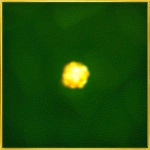 |
1 | 1 | 5 | 2 | 120 |
| 2 | 3 | 1.67 | 6 | 360 | |
| 3 | 5 | 1 | 10 | 600 | |
| 4 | 7 | 0.71 | 14 | 840 | |
| 5 | 9 | 0.56 | 18 | 1080 | |
Chunk of Pollen |
1 | 14 | 4.29 | 1.4 | 84 |
| 2 | 18 | 3.33 | 1.8 | 108 | |
| 3 | 22 | 2.73 | 2.2 | 132 | |
| 4 | 26 | 2.31 | 2.6 | 156 | |
| 5 | 30 | 2 | 3 | 180 | |
Whirl of Pollen |
1 | 35 | 5.71 | 0.58 | 35 |
| 2 | 41 | 4.88 | 0.68 | 41 | |
| 3 | 47 | 4.26 | 0.78 | 47 | |
| 4 | 53 | 3.77 | 0.88 | 53 | |
| 5 | 59 | 3.39 | 0.98 | 59 | |
Flurry of Pollen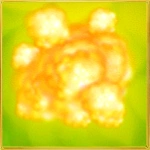 |
1 | 75 | 8 | 0.31 | 18.75 |
| 2 | 83 | 7.23 | 0.35 | 20.75 | |
| 3 | 91 | 6.59 | 0.38 | 22.75 | |
| 4 | 99 | 6.06 | 0.41 | 24.75 | |
| 5 | 107 | 5.61 | 0.45 | 26.75 | |
Cloud of Pollen |
1 | 150 | 8 | 0.31 | 18.75 |
| 2 | 160 | 7.5 | 0.33 | 20 | |
| 3 | 170 | 7.06 | 0.35 | 21.25 | |
| 4 | 180 | 6.67 | 0.38 | 22.5 | |
| 5 | 190 | 6.32 | 0.4 | 23.75 | |
Storm of Pollen |
1 | 290 | 10.34 | 0.24 | 14.5 |
| 2 | 302 | 9.93 | 0.25 | 15.1 | |
| 3 | 314 | 9.55 | 0.26 | 15.7 | |
| 4 | 326 | 9.2 | 0.27 | 16.3 | |
| 5 | 338 | 8.88 | 0.28 | 16.9 |
Spots
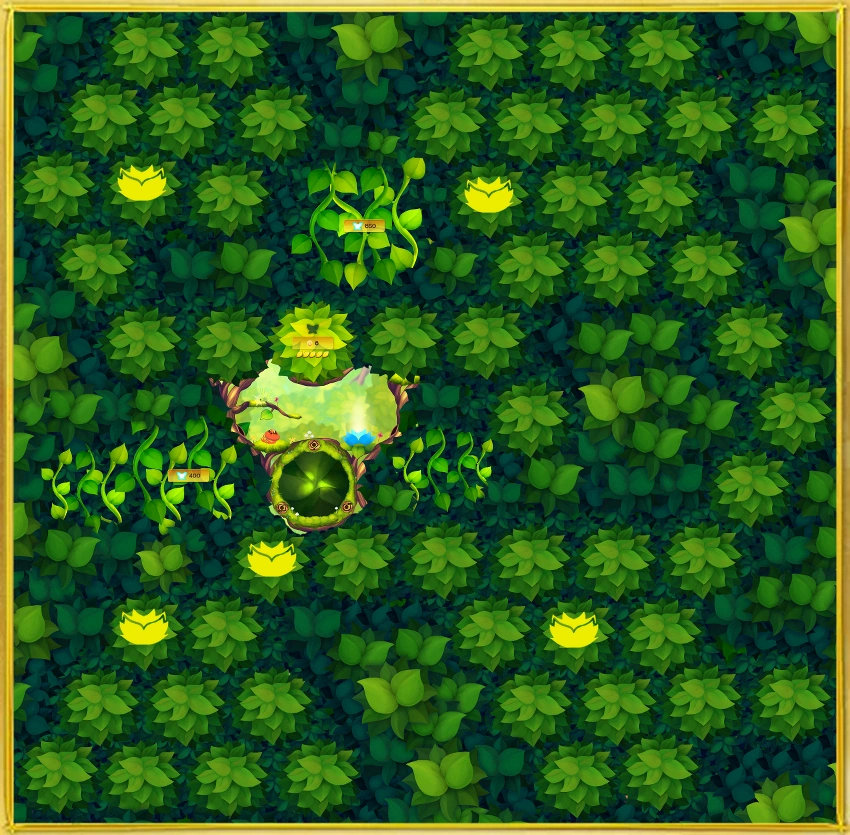
When expanding through the forest occasionally you will find a Pollen Flower spot instead of more space for your butterflies. These spots are fixed and apart from the first two flowers they can be unlocked in any order.

The picture to the right shows the spots where Pollen Flowers can be found.
Colours
There are five possible colours for Pollen Flowers. The first flower unlocked is blue and the second is pink, however the colours of the remaining flowers are completely random, so there is no guarantee that all five colours will be present in your forest. It is not possible to influence the starting colour of a Pollen Flower, but it can be changed by using a Special Ability.


Special Abilities
In addition to the Buff-Tailed Bumblebee's ability to double the amount of pollen, also some butterflies can influence Pollen Flowers using their Special Ability:
- Half the Cost of a Pollen Flower's Next Shift every two days
- Red Lacewing
- Black Jezebel
- Long-Tailed Skipper
- Great Blue Hairstreak
- Splendid Dotted Border
- Antea Clearwing
- Hurry a Pollen Flower every 24 hours
- Change the Color of a Pollen Flower every 5 days
- Large Fairy Hairstreak (Upgraded 2 days)
- Great Stripestreak (Upgraded 2 days)
Related Goals
- Speedy Flower: Hurry a pollen flower (Reward:
 2)
2) - Growing Up: Upgrade 2 Pollen Flowers (Reward: Twig )
- Growing Up II: Fully Upgrade a Pollen Flower (Reward: 100% Epic)
- Shift Worker: Set 20 Flower shifts (Reward: 20)
- Shift Worker II: Set 250 Flower shifts (Reward: 1,000)
- Shift Worker III: Set 1,000 Flower shifts (Reward: 10,000)
- Hayfever: Collect 100 Pollen (Reward: 25)
- Hayfever II: Collect 1,000 Pollen (Reward: 10,000)
- Hayfever III: Collect 2,500 Pollen (Reward: 10,000)
- Long-Haul: Set a 20 hour shift (Reward: 2)
- Industrial Pollen: Flower shifts total 1 month (Reward: 10)
Notes
- When fusing butterflies together, you can save pollen by only leveling up one of the two butterflies you plan to fuse. Fusing two butterflies that are both maxed out at level one will produce a butterfly at level one that can reach level two. Fusing two butterflies that can only reach level one, but are at level zero will produce a butterfly that can reach level two that is at level zero. Fusing one level zero butterfly with a level one (assuming both only have the potential to reach level one) will produce a butterfly that is at level one and can reach level two. Since fusing two butterflies will create a butterfly with a higher potential but the same level as the better of the two that were fused, you should only level up your best butterfly of each species when fusing.
- The pollen cap was introduced with Update 1.85 on 7th May 2014 to reduce lags in the game.
- Since the introduction of the Hairstreak Set 27th November 2014 it's possible to change Pollen Flower colour by using butterflies' Special Abilities.
- Since January 2017 Pollen Flowers can be orange, too.