No edit summary |
No edit summary |
||
| Line 1: | Line 1: | ||
{| |
{| |
||
| − | | style="vertical-align:top;" | |
+ | | style="vertical-align:top;" | {{PAGENAME}} are flowers that produce pollen, which is used to level up butterflies. They can be [[#Upgrading|upgraded]] with {{FB}} to make more pollen per [[#Shifts|shift]] and {{HD}} spent. <br/><br/> |
[[File:20130227UpgradePollenFlowers.png|275px|left]] |
[[File:20130227UpgradePollenFlowers.png|275px|left]] |
||
| style="text-align:right;" | [[File:20130405PollenFlowersShifts.png|right|300px]]<br/> |
| style="text-align:right;" | [[File:20130405PollenFlowersShifts.png|right|300px]]<br/> |
||
| Line 74: | Line 74: | ||
</center> |
</center> |
||
| − | == |
+ | ==Shifts== |
| + | {| |
||
| − | |||
| + | | width="50%" | |
||
| ⚫ | |||
| + | To get pollen from {{PAGENAME}}, you must choose a shift, which can be hurried with {{FB}}.<br/><br/> |
||
| − | * You can hurry pollen flowers with flutterbucks. |
||
| + | [[File:MakePollenOvercapped.png|220px|right]] |
||
| − | * In April 2014, a pollen cap was added by the developers. This means that the amount of pollen you can keep in your forest at once is now limited to a maximum of 1,000 pollen per pollen flower (irrespective of upgrade level). You should not be able to get over this cap anymore and also are not able to start new shifts until you have fed enough pollen to your butterflies. |
||
| + | The amount of pollen you can ''keep'' in your forest at once is limited to a maximum of 1,000 pollen per {{PAGENAME}} (irrespective of upgrade level). It is possible to get over the cap, inter alia by using the [[Buff-Tailed Bumble Bee|Honeybee]], but it's not possible to start new shifts until you have fed enough pollen to your butterflies. The difference between the cap and the chosen shift must be at least the amount the shift produces (without doubled by the [[Buff-Tailed Bumble Bee|Honeybee]]) to be available. |
||
| + | | style="vertical-align:top;text-align:center;padding-left:50px;" | '''Shift Menus''' |
||
| + | <tabber>|-| Stage 1 = [[File:MakePollenMenuLvl01.png|300px]] |
||
| + | |-| Stage 2 = [[File:MakePollenMenuLvl02.png|300px]] |
||
| + | |-| Stage 3 = [[File:MakePollenMenuLvl03.png|300px]] |
||
| + | |-| Stage 4 = [[File:MakePollenMenuLvl04.png|300px]] |
||
| + | |-| Stage 5 = [[File:MakePollenMenuLvl05.png|300px]] |
||
| + | |-| Low Honeydew = [[File:MakePollenMenuGreyedOut.png|300px]] |
||
| + | </tabber> |
||
| ⚫ | |||
| + | {{Clear}} |
||
| + | ==Upgrading== |
||
| + | {| |
||
| + | | style="vertical-align:top;" | [[File:ButtonUpgradePollenFlowerNATutorial.png|left|250px]] |
||
| + | | style="vertical-align:top;" | During the [[Tutorial]] you get introduced on upgrading {{PAGENAME}}s, before reaching this step, the button will be greyed out. |
||
| + | |- |
||
| + | | style="vertical-align:top;" | [[File:ButtonUpgradePollenFlower.png|left|250px]] |
||
| + | | style="vertical-align:top;" | Each following upgrade will require spending {{FB}}: |
||
| + | * First upgrade to 2<sup>nd</sup> Stage {{FB}} 5 |
||
| + | * Second upgrade to 3<sup>rd</sup> Stage {{FB}} 10 |
||
| + | * Third upgrade to 4<sup>th</sup> Stage {{FB}} 20 |
||
| + | * Fourth upgrade to 5<sup>th</sup> Stage {{FB}} 40. <br/> |
||
| + | Upgrading a {{PAGENAME}} completly will cost {{FB}} 75 in total, upgrading all six {{PAGENAME}}s {{FB}} 445, as the upgrade during the [[Tutorial]] is for free. |
||
| ⚫ | |||
| + | | style="vertical-align:top;" | [[File:ButtonUpgradePollenFlowerNAlvl05.png|left|250px]] |
||
| + | | style="vertical-align:top;" | As soon as you fully upgraded a {{PAGENAME}}, the button will be greyed out again. |
||
| ⚫ | |||
| + | {{Clear}} |
||
| ⚫ | |||
| ⚫ | |||
| + | {| class="article-table" cellpadding=0 cellspacing=0 style="width:100%;border-top:1px solid #b2af9c;border-bottom:1px solid #b2af9c;border-left:1px solid #b2af9c;border-right:1px solid #b2af9c;text-align:center;" |
||
| ⚫ | |||
| − | {|border="1" cellpadding="1" cellspacing="1" class="article-table" |
||
|- |
|- |
||
| + | ! style="text-align:center;" | [[#Shifts|Shift]] |
||
| − | ! scope="col"|Shift Name |
||
| + | ! style="text-align:center;" | Stage |
||
| − | ! scope="col"|Flower Level |
||
| − | ! |
+ | ! style="text-align:center;" | [[File:PollenTotal.png|22px]] Generated |
| + | ! style="text-align:center;" | [[File:HD.png|20px]] per [[File:PollenTotal.png|25px]] |
||
| − | ! scope="col"|Cost/pollen |
||
| + | ! style="text-align:center;" | [[File:PollenTotal.png|22px]] per minute |
||
| − | ! scope="col"|Cost (honeydew) |
||
| + | ! style="text-align:center;" | [[File:PollenTotal.png|22px]] per hour |
||
| − | ! scope="col"|Time |
||
|- |
|- |
||
| − | | rowspan="5"|Speck of Pollen |
+ | | rowspan="5" style="border-right:1px solid #b2af9c;" | '''Speck of Pollen'''<br/> |
| + | <div style="font-size:90%">Costs: [[File:HD.png|12px]] 5<br/> |
||
| ⚫ | |||
| + | [[File:EClock.png|12px]] 30 seconds</div> |
||
| ⚫ | |||
| + | |1||1||{{#expr:5/1 round 2}}||{{#expr:1*2 round 2}}||{{#expr:1*120 round 2}} |
||
| ⚫ | |||
| − | | rowspan="5"|5 |
||
| − | | rowspan="5"|30 sec |
||
|- |
|- |
||
| + | |2||3||{{#expr:5/3 round 2}}||{{#expr:3*2 round 2}}||{{#expr:3*120 round 2}} |
||
| − | |2 |
||
| − | |3 |
||
| − | |1.67 |
||
|- |
|- |
||
| + | |3||5||{{#expr:5/5 round 2}}||{{#expr:5*2 round 2}}||{{#expr:5*120 round 2}} |
||
| − | |3 |
||
| − | |5 |
||
| − | |1 |
||
|- |
|- |
||
| + | |4||7||{{#expr:5/7 round 2}}||{{#expr:7*2 round 2}}||{{#expr:7*120 round 2}} |
||
| − | |4 |
||
| − | |7 |
||
| − | |0.71 |
||
|- |
|- |
||
| + | |5||9||{{#expr:5/9 round 2}}||{{#expr:9*2 round 2}}||{{#expr:9*120 round 2}} |
||
| − | |5 |
||
| − | |9 |
||
| − | |0.56 |
||
|- |
|- |
||
| − | | rowspan="5"|Chunk of Pollen |
+ | | rowspan="5" style="border-right:1px solid #b2af9c;" | '''Chunk of Pollen'''<br/> |
| + | <div style="font-size:90%">Costs: [[File:HD.png|12px]] 60<br/> |
||
| − | |1 |
||
| + | [[File:EClock.png|12px]] 10 minutes</div> |
||
| − | |14 |
||
| + | |1||14||{{#expr:60/14 round 2}}||{{#expr:14/10 round 2}}||{{#expr:14/10*60 round 2}} |
||
| − | |4.3 |
||
| − | | rowspan="5"|60 |
||
| − | | rowspan="5"|10 min |
||
|- |
|- |
||
| + | |2||18||{{#expr:60/18 round 2}}||{{#expr:18/10 round 2}}||{{#expr:18/10*60 round 2}} |
||
| − | |2 |
||
| − | |18 |
||
| − | |3.33 |
||
|- |
|- |
||
| + | |3||22||{{#expr:60/22 round 2}}||{{#expr:22/10 round 2}}||{{#expr:22/10*60 round 2}} |
||
| − | |3 |
||
| − | |22 |
||
| − | |2.7 |
||
|- |
|- |
||
| + | |4||26||{{#expr:60/26 round 2}}||{{#expr:26/10 round 2}}||{{#expr:26/10*60 round 2}} |
||
| − | |4 |
||
| − | |26 |
||
| − | |2.3 |
||
|- |
|- |
||
| + | |5||30||{{#expr:60/30 round 2}}||{{#expr:30/10 round 2}}||{{#expr:30/10*60 round 2}} |
||
| − | |5 |
||
| − | |30 |
||
| − | |2.0 |
||
|- |
|- |
||
| − | | rowspan="5"|Whirl of Pollen |
+ | | rowspan="5" style="border-right:1px solid #b2af9c;" | '''Whirl of Pollen'''<br/> |
| + | <div style="font-size:90%">Costs: [[File:HD.png|12px]] 200<br/> |
||
| − | |1 |
||
| + | [[File:EClock.png|12px]] 1 hour</div> |
||
| − | |35 |
||
| + | |1||35||{{#expr:200/35 round 2}}||{{#expr:35/60 round 2}}||35 |
||
| − | |5.7 |
||
| − | | rowspan="5"|200 |
||
| − | | rowspan="5"|1 hr |
||
|- |
|- |
||
| + | |2||41||{{#expr:200/41 round 2}}||{{#expr:41/60 round 2}}||41 |
||
| − | |2 |
||
| − | |41 |
||
| − | |4.88 |
||
|- |
|- |
||
| + | |3||47||{{#expr:200/47 round 2}}||{{#expr:47/60 round 2}}||47 |
||
| − | |3 |
||
| − | |47 |
||
| − | |4.2 |
||
|- |
|- |
||
| + | |4||53||{{#expr:200/53 round 2}}||{{#expr:53/60 round 2}}||53 |
||
| − | |4 |
||
| − | |53 |
||
| − | |3.8 |
||
|- |
|- |
||
| + | |5||59||{{#expr:200/59 round 2}}||{{#expr:59/60 round 2}}||59 |
||
| − | |5 |
||
| − | |59 |
||
| − | |3.4 |
||
|- |
|- |
||
| − | | rowspan="5"|Flurry of Pollen |
+ | | rowspan="5" style="border-right:1px solid #b2af9c;" | '''Flurry of Pollen'''<br/> |
| + | <div style="font-size:90%">Costs: [[File:HD.png|12px]] 600<br/> |
||
| − | |1 |
||
| + | [[File:EClock.png|12px]] 4 hours</div> |
||
| − | |75 |
||
| + | |1||75||{{#expr:600/75 round 2}}||{{#expr:75/4/60 round 2}}||{{#expr:75/4 round 2}} |
||
| − | |8 |
||
| − | | rowspan="5"|600 |
||
| − | | rowspan="5"|4 hrs |
||
|- |
|- |
||
| + | |2||83||{{#expr:600/83 round 2}}||{{#expr:83/4/60 round 2}}||{{#expr:83/4 round 2}} |
||
| − | |2 |
||
| − | |83 |
||
| − | |7.23 |
||
|- |
|- |
||
| + | |3||91||{{#expr:600/91 round 2}}||{{#expr:91/4/60 round 2}}||{{#expr:91/4 round 2}} |
||
| − | |3 |
||
| − | |91 |
||
| − | |6.5 |
||
|- |
|- |
||
| + | |4||99||{{#expr:600/99 round 2}}||{{#expr:99/4/60 round 2}}||{{#expr:99/4 round 2}} |
||
| − | |4 |
||
| − | |99 |
||
| − | |6.1 |
||
|- |
|- |
||
| + | |5||107||{{#expr:600/107 round 2}}||{{#expr:107/4/60 round 2}}||{{#expr:107/4 round 2}} |
||
| − | |5 |
||
| − | |107 |
||
| − | |5.6 |
||
|- |
|- |
||
| − | | rowspan="5"|Cloud of Pollen |
+ | | rowspan="5" style="border-right:1px solid #b2af9c;" | '''Cloud of Pollen'''<br/> |
| + | <div style="font-size:90%">Costs: [[File:HD.png|12px]] 1,200<br/> |
||
| − | |1 |
||
| + | [[File:EClock.png|12px]] 8 hours</div> |
||
| − | |150 |
||
| + | |1||150||{{#expr:1200/150 round 2}}||{{#expr:150/8/60 round 2}}||{{#expr:150/8 round 2}} |
||
| − | |8 |
||
| − | | rowspan="5"|1,200 |
||
| − | | rowspan="5"|8 hrs |
||
|- |
|- |
||
| + | |2||160||{{#expr:1200/160 round 2}}||{{#expr:160/8/60 round 2}}||{{#expr:160/8 round 2}} |
||
| − | |2 |
||
| − | |160 |
||
| − | |7.5 |
||
|- |
|- |
||
| + | |3||170||{{#expr:1200/170 round 2}}||{{#expr:170/8/60 round 2}}||{{#expr:170/8 round 2}} |
||
| − | |3 |
||
| − | |170 |
||
| − | |7.0 |
||
|- |
|- |
||
| + | |4||180||{{#expr:1200/180 round 2}}||{{#expr:180/8/60 round 2}}||{{#expr:180/8 round 2}} |
||
| − | |4 |
||
| − | |180 |
||
| − | |6.7 |
||
|- |
|- |
||
| + | |5||190||{{#expr:1200/190 round 2}}||{{#expr:190/8/60 round 2}}||{{#expr:190/8 round 2}} |
||
| − | |5 |
||
| − | |190 |
||
| − | |6.3 |
||
|- |
|- |
||
| − | | rowspan="5"|Storm of Pollen |
+ | | rowspan="5" style="border-right:1px solid #b2af9c;" | '''Storm of Pollen'''<br/> |
| + | <div style="font-size:90%">Costs: [[File:HD.png|12px]] 3,000<br/> |
||
| − | |1 |
||
| + | [[File:EClock.png|12px]] 20 hours</div> |
||
| − | |290 |
||
| + | |1||290||{{#expr:3000/290 round 2}}||{{#expr:290/20/60 round 2}}||{{#expr:290/20 round 2}} |
||
| − | |10.3 |
||
| − | | rowspan="5"|3,000 |
||
| − | | rowspan="5"|20 hrs |
||
|- |
|- |
||
| + | |2||302||{{#expr:3000/302 round 2}}||{{#expr:302/20/60 round 2}}||{{#expr:302/20 round 2}} |
||
| − | |2 |
||
| − | |302 |
||
| − | |9.93 |
||
|- |
|- |
||
| + | |3||314||{{#expr:3000/314 round 2}}||{{#expr:314/20/60 round 2}}||{{#expr:314/20 round 2}} |
||
| − | |3 |
||
| − | |314 |
||
| − | |9.5 |
||
|- |
|- |
||
| + | |4||326||{{#expr:3000/326 round 2}}||{{#expr:326/20/60 round 2}}||{{#expr:326/20 round 2}} |
||
| − | |4 |
||
| − | |326 |
||
| − | |9.2 |
||
|- |
|- |
||
| + | |5||338||{{#expr:3000/338 round 2}}||{{#expr:338/20/60 round 2}}||{{#expr:338/20 round 2}} |
||
| − | |5 |
||
| − | |338 |
||
| − | |8.9 |
||
|} |
|} |
||
==Notes== |
==Notes== |
||
* When fusing butterflies together, you can save pollen by only leveling up one of the two butterflies you plan to fuse. Fusing two butterflies that are both maxed out at level one will produce a butterfly at level one that can reach level two. Fusing two butterflies that can only reach level one, but are at level zero will produce a butterfly that can reach level two that is at level zero. Fusing one level zero butterfly with a level one (assuming both only have the potential to reach level one) will produce a butterfly that is at level one and can reach level two. Since fusing two butterflies will create a butterfly with a higher potential but the same level as the better of the two that were fused, you should only level up your best butterfly of each species when fusing. |
* When fusing butterflies together, you can save pollen by only leveling up one of the two butterflies you plan to fuse. Fusing two butterflies that are both maxed out at level one will produce a butterfly at level one that can reach level two. Fusing two butterflies that can only reach level one, but are at level zero will produce a butterfly that can reach level two that is at level zero. Fusing one level zero butterfly with a level one (assuming both only have the potential to reach level one) will produce a butterfly that is at level one and can reach level two. Since fusing two butterflies will create a butterfly with a higher potential but the same level as the better of the two that were fused, you should only level up your best butterfly of each species when fusing. |
||
| + | {{NO}} |
||
[[Category:Flora]] |
[[Category:Flora]] |
||
Revision as of 15:32, 23 September 2014
Pollen Flowers are flowers that produce pollen, which is used to level up butterflies. They can be upgraded with 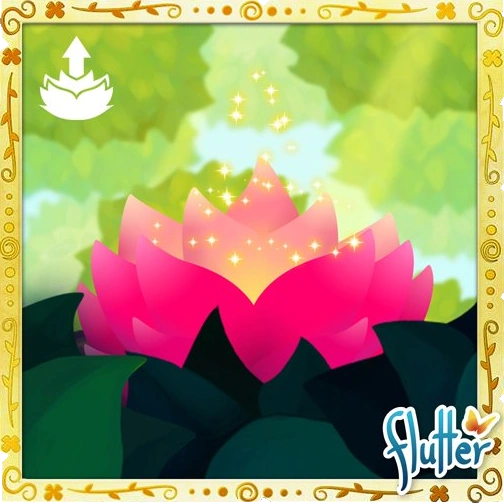 |
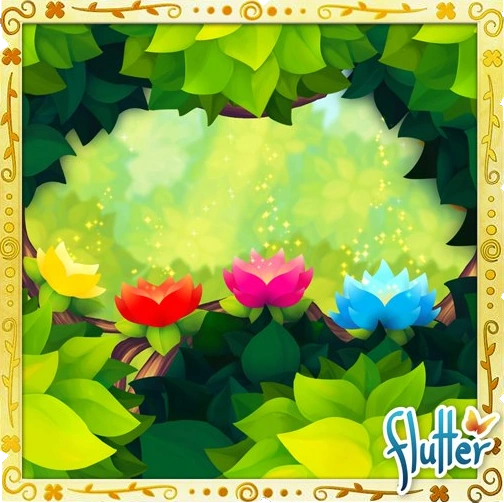 There is currently a maximum total of 6 pollen flowers in the forest. |
Shifts
|
To get pollen from Pollen Flowers, you must choose a shift, which can be hurried with The amount of pollen you can keep in your forest at once is limited to a maximum of 1,000 pollen per Pollen Flowers (irrespective of upgrade level). It is possible to get over the cap, inter alia by using the Honeybee, but it's not possible to start new shifts until you have fed enough pollen to your butterflies. The difference between the cap and the chosen shift must be at least the amount the shift produces (without doubled by the Honeybee) to be available. |
Shift Menus |
Upgrading
| During the Tutorial you get introduced on upgrading Pollen Flowerss, before reaching this step, the button will be greyed out. | |
Each following upgrade will require spending
Upgrading a Pollen Flowers completly will cost | |
| As soon as you fully upgraded a Pollen Flowers, the button will be greyed out again. |
Production Values
The shorter the shift, the more pollen you will get per honeydew invested. A longer shift will result in more pollen, but at a higher cost.
| Shift | Stage | File:PollenTotal.png Generated | File:HD.png per File:PollenTotal.png | File:PollenTotal.png per minute | File:PollenTotal.png per hour |
|---|---|---|---|---|---|
| Speck of Pollen |
1 | 1 | 5 | 2 | 120 |
| 2 | 3 | 1.67 | 6 | 360 | |
| 3 | 5 | 1 | 10 | 600 | |
| 4 | 7 | 0.71 | 14 | 840 | |
| 5 | 9 | 0.56 | 18 | 1080 | |
| Chunk of Pollen |
1 | 14 | 4.29 | 1.4 | 84 |
| 2 | 18 | 3.33 | 1.8 | 108 | |
| 3 | 22 | 2.73 | 2.2 | 132 | |
| 4 | 26 | 2.31 | 2.6 | 156 | |
| 5 | 30 | 2 | 3 | 180 | |
| Whirl of Pollen |
1 | 35 | 5.71 | 0.58 | 35 |
| 2 | 41 | 4.88 | 0.68 | 41 | |
| 3 | 47 | 4.26 | 0.78 | 47 | |
| 4 | 53 | 3.77 | 0.88 | 53 | |
| 5 | 59 | 3.39 | 0.98 | 59 | |
| Flurry of Pollen |
1 | 75 | 8 | 0.31 | 18.75 |
| 2 | 83 | 7.23 | 0.35 | 20.75 | |
| 3 | 91 | 6.59 | 0.38 | 22.75 | |
| 4 | 99 | 6.06 | 0.41 | 24.75 | |
| 5 | 107 | 5.61 | 0.45 | 26.75 | |
| Cloud of Pollen |
1 | 150 | 8 | 0.31 | 18.75 |
| 2 | 160 | 7.5 | 0.33 | 20 | |
| 3 | 170 | 7.06 | 0.35 | 21.25 | |
| 4 | 180 | 6.67 | 0.38 | 22.5 | |
| 5 | 190 | 6.32 | 0.4 | 23.75 | |
| Storm of Pollen |
1 | 290 | 10.34 | 0.24 | 14.5 |
| 2 | 302 | 9.93 | 0.25 | 15.1 | |
| 3 | 314 | 9.55 | 0.26 | 15.7 | |
| 4 | 326 | 9.2 | 0.27 | 16.3 | |
| 5 | 338 | 8.88 | 0.28 | 16.9 |
Notes
- When fusing butterflies together, you can save pollen by only leveling up one of the two butterflies you plan to fuse. Fusing two butterflies that are both maxed out at level one will produce a butterfly at level one that can reach level two. Fusing two butterflies that can only reach level one, but are at level zero will produce a butterfly that can reach level two that is at level zero. Fusing one level zero butterfly with a level one (assuming both only have the potential to reach level one) will produce a butterfly that is at level one and can reach level two. Since fusing two butterflies will create a butterfly with a higher potential but the same level as the better of the two that were fused, you should only level up your best butterfly of each species when fusing.